


Step-by-Step Guide
Follow the steps below, in order, to update your base from the initial version to v1.1.0.
Create New Tables
Start by downloading the files you need:
- Unzip the file you downloaded to get the 2 .csv files.
- Log in to Airtable and navigate to your base.
- Follow these instructions to import the .csv files.
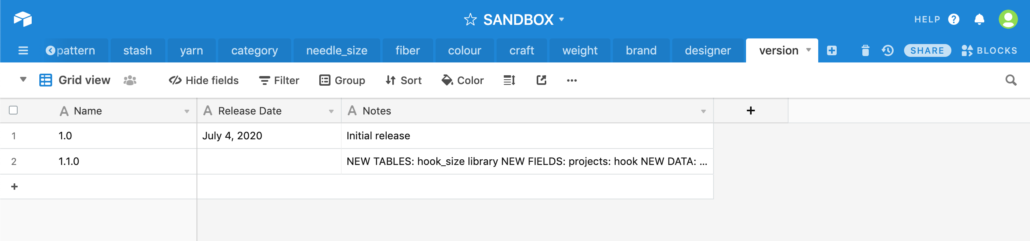
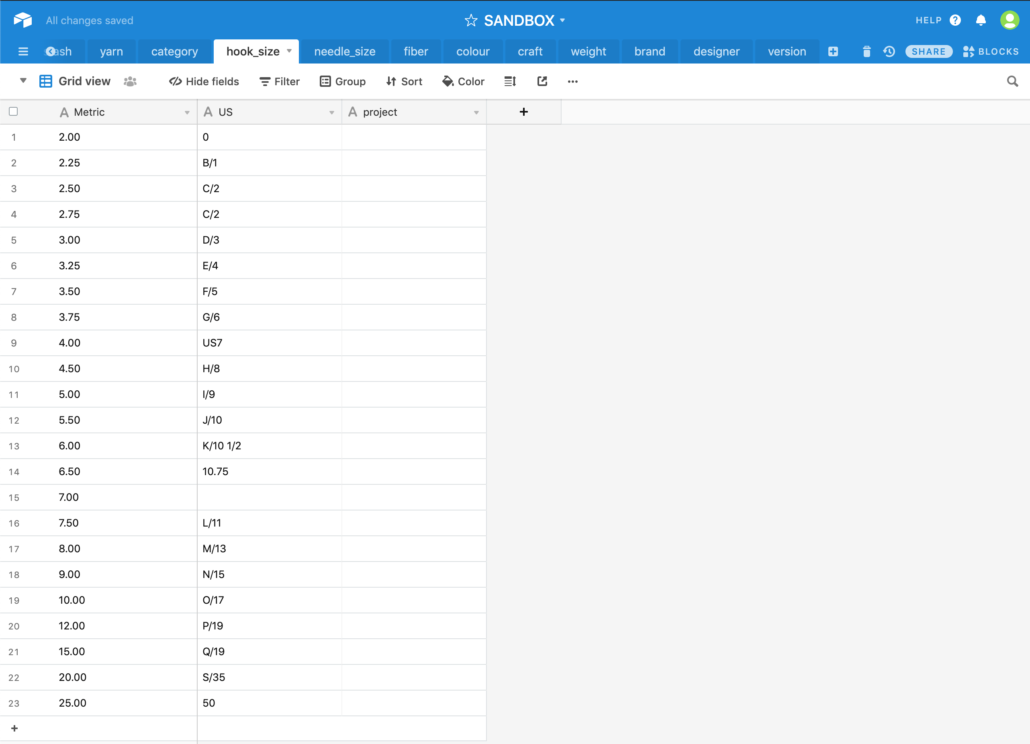
- Rename the tables “version”, “hook_size”, and “library”, as appropriate.
- Arrange the tables so that hook_size is to the left of needle_size and library is to the left of pattern.
You should have 3 new tables that look like this:

You can now delete the downloaded files from your computer and move on to the next step.
Add New Fields
This part needs to be done manually.
Navigate to the “project” table.
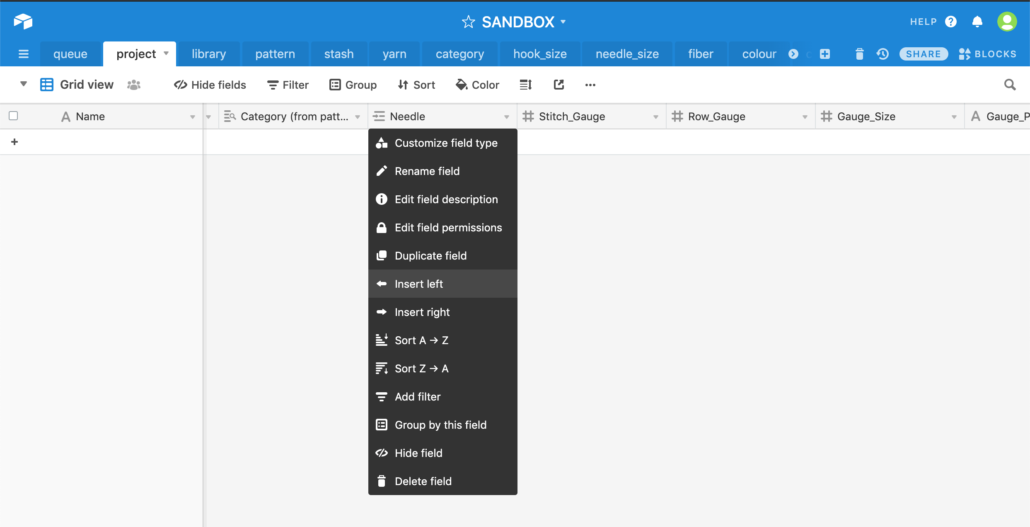
Find the “Needle” field.
Click on the dropdown on the “Needle” field and select “Insert left”.
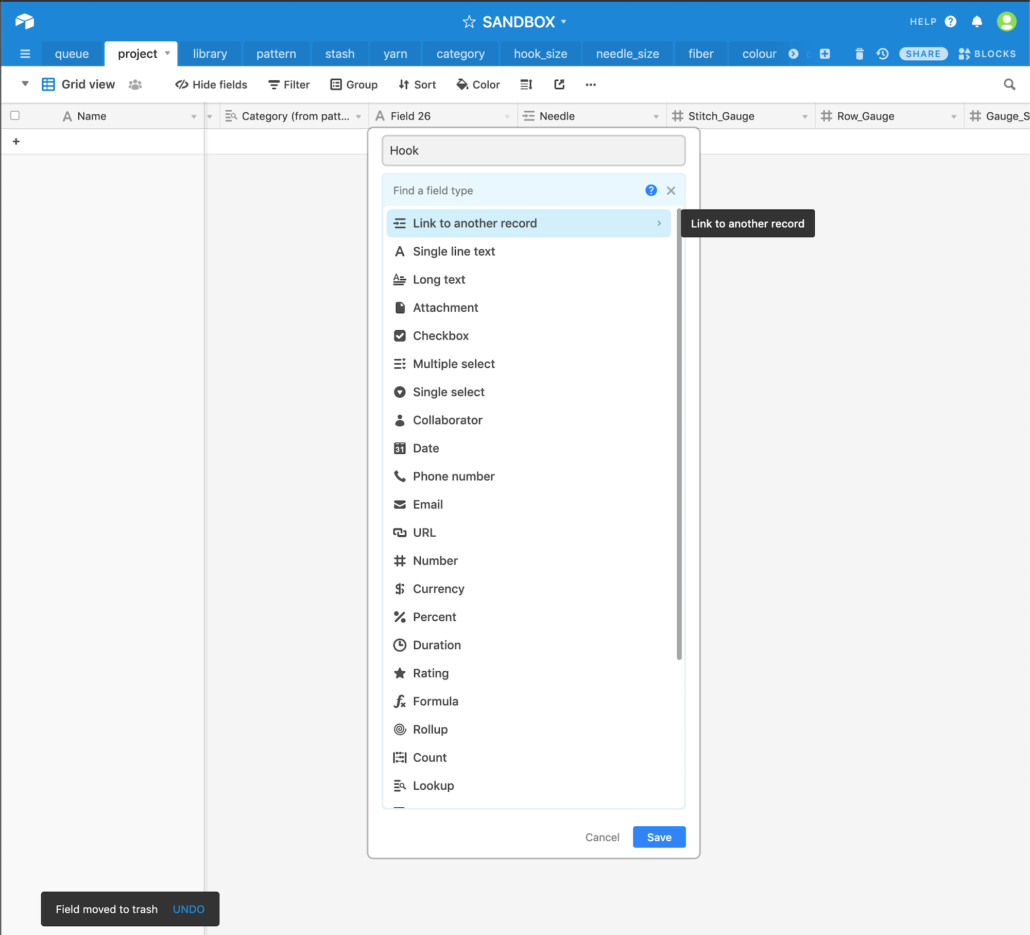
Name the field “Hook”.
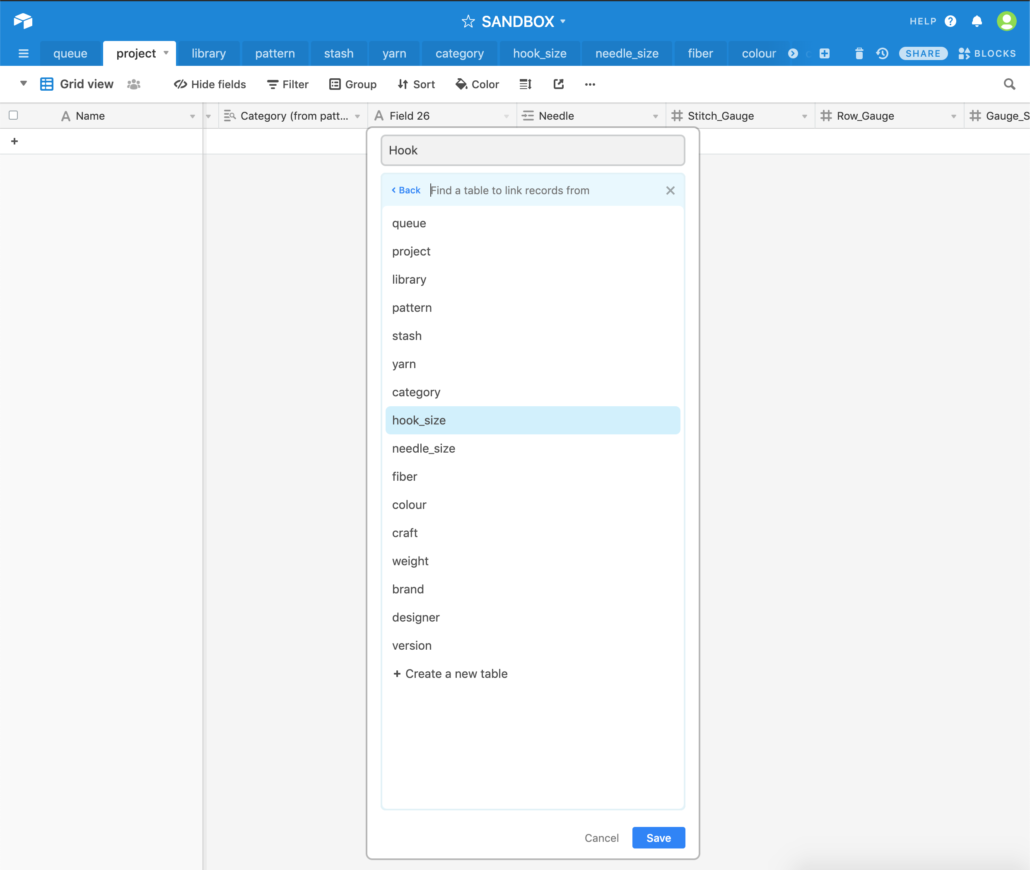
Set the field type to “Link to another record” and select “hook_size” from the list.
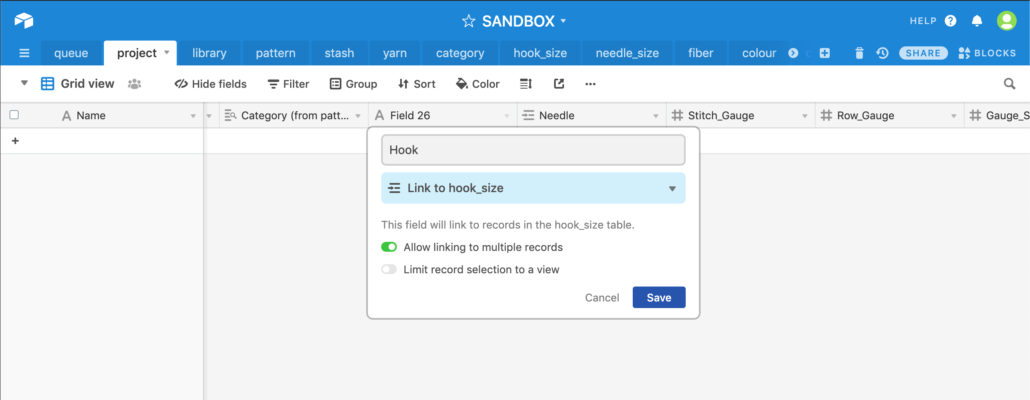
Make sure that “allow linking to multiple records” is set (green) and “limit record selection to a view” is not set (grey). Note: these are the default values, you should not need to change them.
Click “Save”.
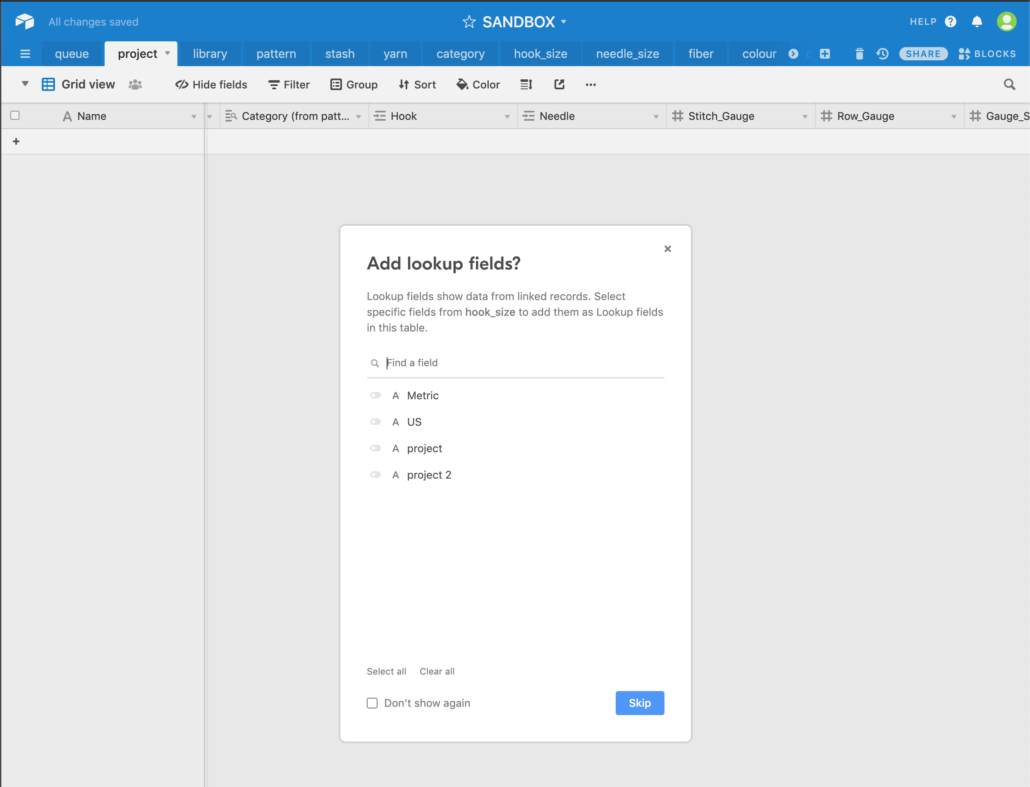
If the lookup fields prompt appears, click “Skip”.
You are now ready to load the new data.
Load New Data
For this part you will need to install the “CSV Import” block.
Download the files to load:
Category
For this table you are adding new records to the existing data.
Navigate to the category table and drop the category csv file onto the import csv block. It should look like the screenshot below. If it doesn’t, make adjustments until it does.
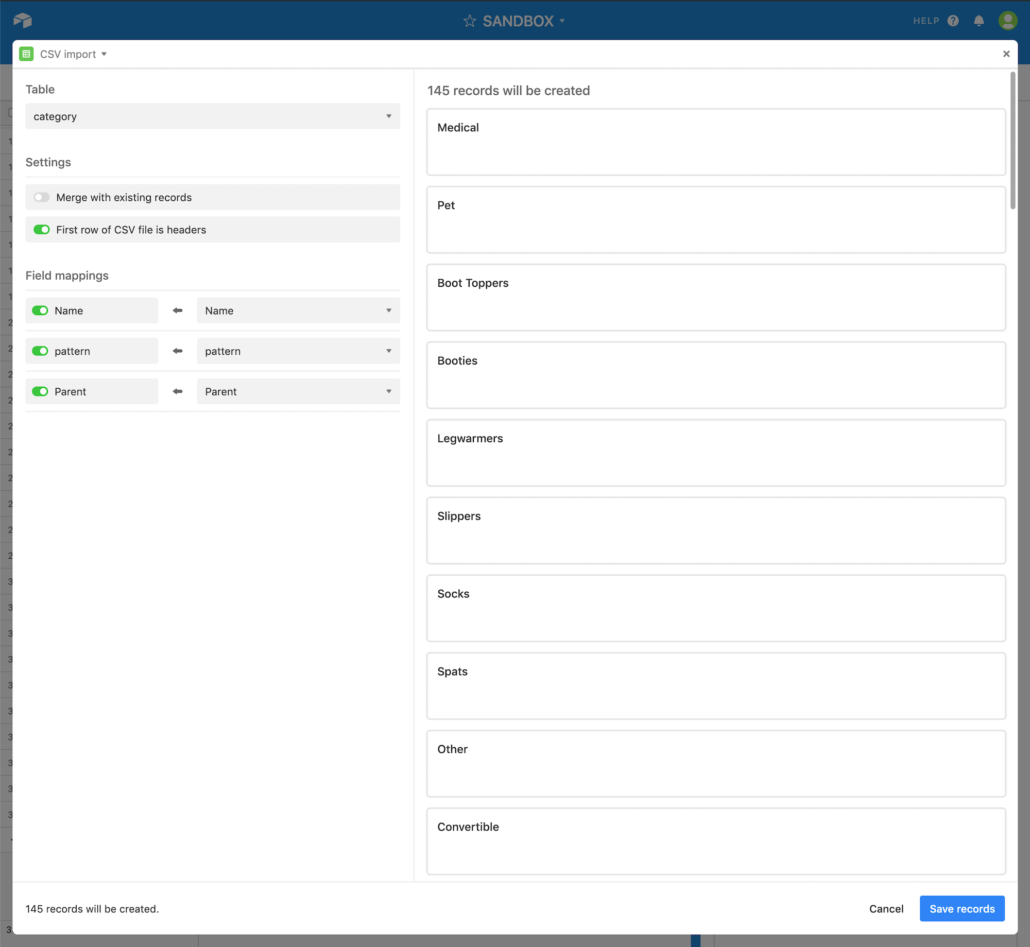
Click “Save Records”.
Your category table should now have 185 records.
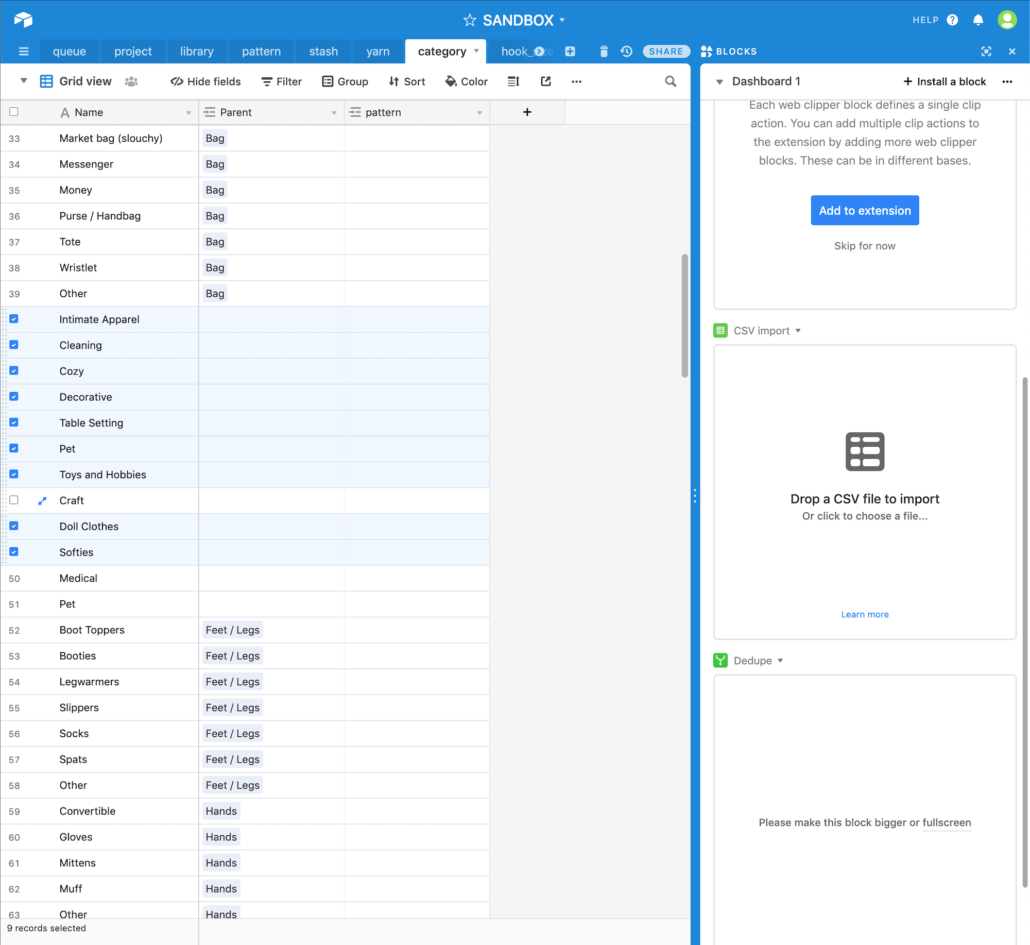
Note: When testing this, I consistently got an error where Airtable created 9 extra rows. If this happens for you, delete the records shown in the screenshot below – the row numbers should be the same.
Designer & Brand
For this table you are adding more data to existing records.
Navigate to the designer table and drop the designer csv file onto the import csv block. Change the settings shown until it looks like the below screenshot.
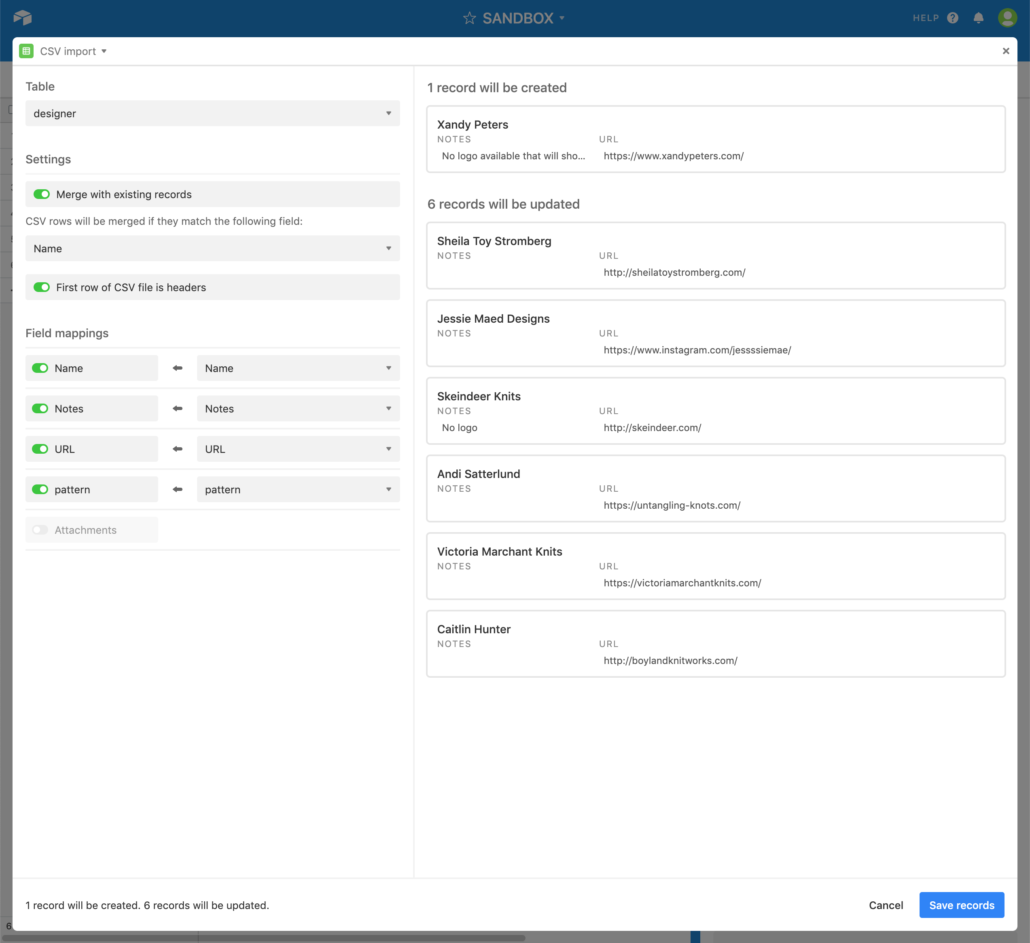
Click “Save Records”.
Your designer table should now have URL data.
Navigate to the brand table and drop the brand csv file onto the import csv block. Change the settings shown until it looks like the below screenshot.
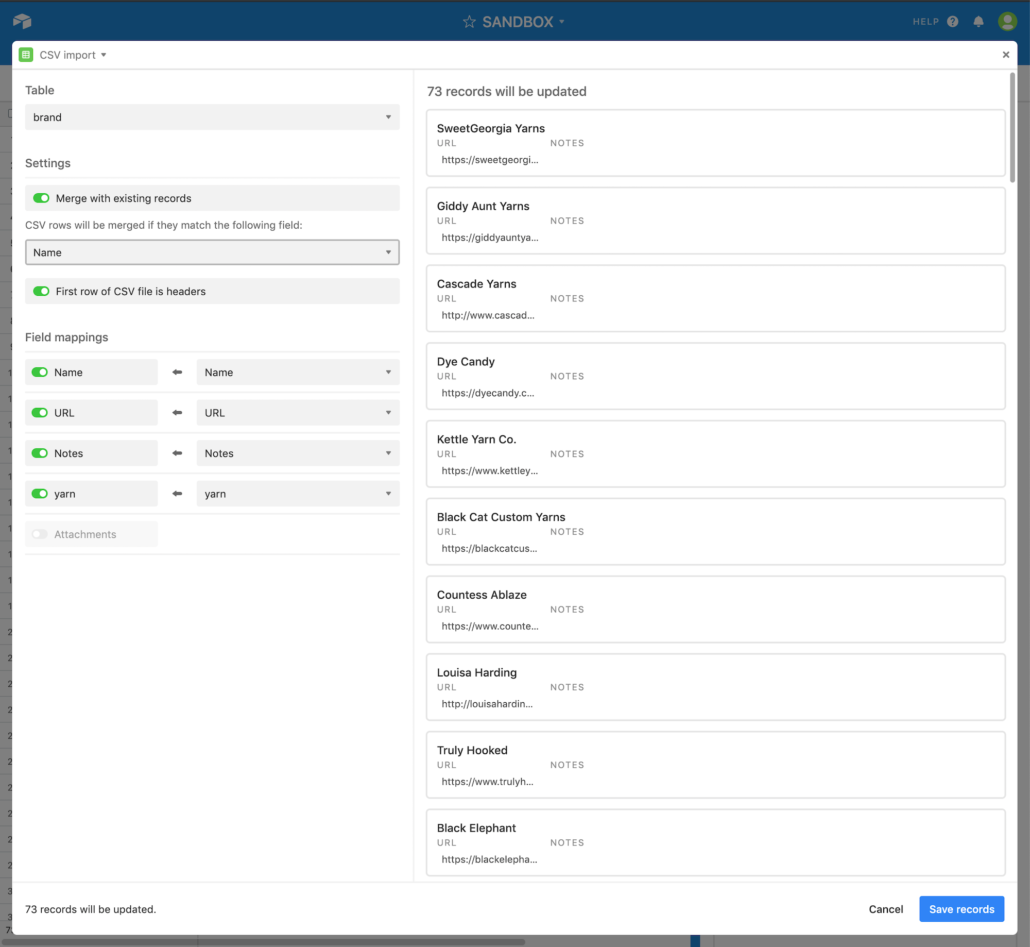
Click “Save Records”.
Your brand table should now have URL data.
Congratulations – you’re done!
If this free base, guide, and technical support helped you, please consider buying me a coffee.