If you’ve been following my thoughts on inclusive sizing, you’ll already know that my body isn’t shaped the way size charts say it is. (If this is your first foray into my opinions here, it’s a good idea to read Designing for Fat Bodies first.) Today I want to go into a little more detail about the specifics of my measurements, to demonstrate how garments that are graded by standard size charts won’t fit me. And then I’m going to show you that I’m not alone.
But first… some disclaimers
Size Charts are Good, and Necessary
This post isn’t intended to be an attack on size charts. Far from it! Size charts are a vital part of the design and fit process. What I’m trying to do here is to show their limitations, so that designers can understand which parts of them are most likely to cause fit issues for those of us with differently shaped bodies, and keep that in mind when designing so that any opportunities to include knitters with those bodies can be taken.
We Have to Start Somewhere
Because I’m coming at this from a knitwear design perspective, I’m going to convert between sizing systems and size charts based on the full bust measurement. This isn’t to say that I think the full bust is the most important measurement, or the one you should always be sizing by – that’s definitely not the case! – but I’ve got to link everything together somehow and that seems to be the most logical choice.
It Takes Cooperation
I am a big fan of learning skills. I believe it serves everybody to understand their own bodies, how garments are constructed and fit, and how to make adjustments and modifications to get a garment that you’re happy wearing.
BUT.
It’s always the same people having to make the modifications, and those people already have less choice in ready to wear clothing for exactly the same reasons: nothing fits properly because they’ve been made to fit the size chart, which doesn’t reflect their body.
It’s not fair (and before you ask, Jareth, my basis for comparison is the immaculate fit of those trousers you’re wearing on your oh-so-straight-sized legs) and more importantly, it’s simply not practical. Bodies have to wear clothes in order to take part in society, and people have to take part in society in order to survive. Clothes are a need. Clothes that fit are a need. Clothes that fit, are suitable for your chosen activity, and that make you feel like you are the very minimum of the requirement here. It is not reasonable to expect anyone whose body happens to not fit the size chart to have to learn the intricacies of dressmaking and garment design in order to exist. Is it a laudable thing to do? Absolutely. Do I think it’s a worthwhile skill? For me, personally, yes. Should anyone who happens to need a different size HAVE to do it?
NO. Hell no. Into the oubliette with that idea.
What we need, as a community, is to work together to provide all the information and support possible to give every knitter the best chance of making any given garment fit. If you know modifications are going to be needed (spoiler: modifications are always needed, somewhere, by someone) and you have information that will help a knitter to do that, give it to them.
All Bodies Are Good Bodies
The focus of this post is to talk about the body sizes and shapes that don’t fit the size charts. If I were talking about these things purely in statistical terms, I’d be using words like “outlier” and “standard deviation” and “aberrant data point”, and lots of other things that make bodies sound different and wrong. So let me state very clearly and upfront: all bodies are good bodies. No bodies are wrong. Your body, whatever size or shape it is, is good and wonderful and just perfect the way it is. You and your body deserve wonderful, well fitting knitted things that make you feel like the very best version of you there is.
Okay. Let’s go.
A Sample of One
My Measurements
If we’re going to talk about how some bodies don’t fit into the size charts, we’re going to need some specific examples, and it’s only fair that I go first. So let’s get stuck in.
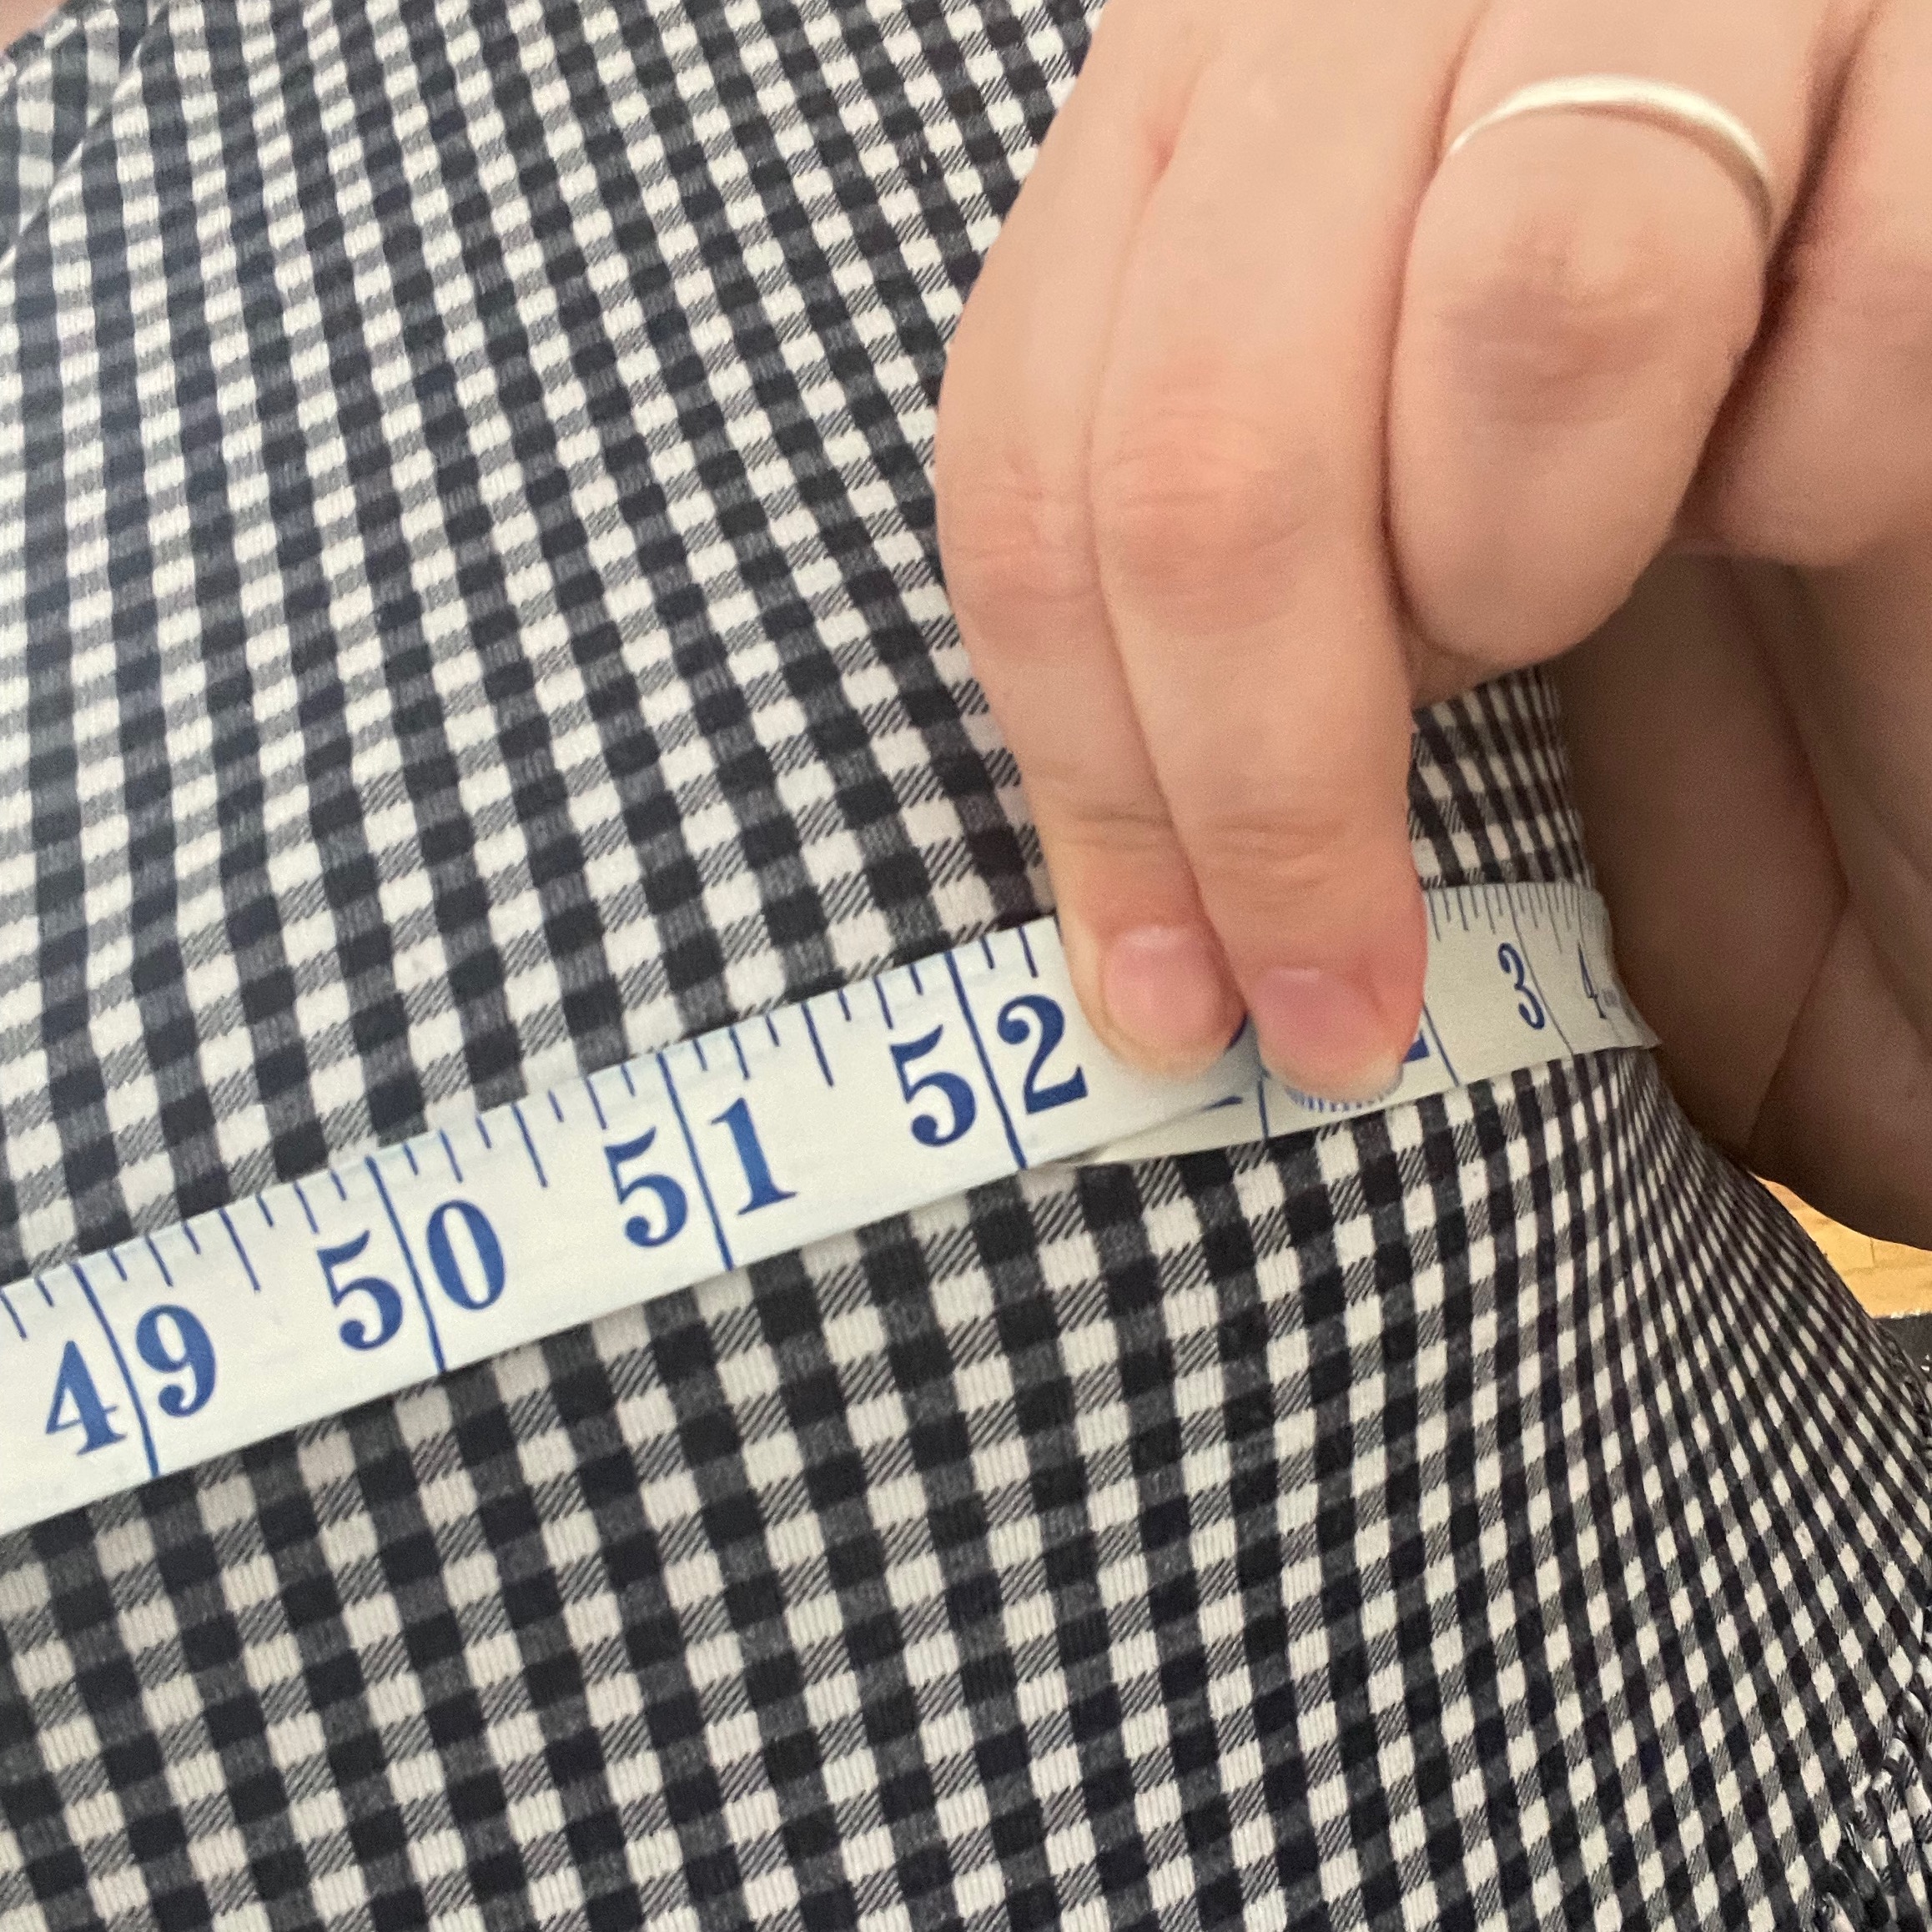
My full bust measurement is 52″. According to the Craft Yarn Council’s size chart, that makes me a size 3X. (If you’re not familiar with these measurements, they’re all explained here.)
| Measurement | Size 3X | Me | Difference |
| Chest | 52-54″ | 52″ | none |
| Centre Back | 30.5-31″ | 28″ | -2.5″ |
| Back Waist | 18″ | 17″ | -1″ |
| Cross Back | 18″ | 15.5″ | -2.5″ |
| Arm Length | 18″ | 17″ | -1″ |
| Upper Arm | 17″ | 22″ | +5″ |
| Armhole Depth | 9-9.5″ | 9.5″ | none |
| Waist | 44-45″ | 52″ | +7″ |
| Hips | 54-55″ | 65″ | +10″ |
As you can see, there are differences across the board, and in both directions: in some places I’m smaller than the standard, and in others I’m larger.
Some differences aren’t a problem. Being an inch shorter in the arms is just fine, especially since I like my sleeves on the longer side. Being an inch shorter in the torso (back waist)? Well, I’m only 5’4″, that’s to be expected. But being 5″ bigger in the bicep and 10″ bigger in the hips? Neither of those are going to work. Even if the pattern had enough positive ease built in for it to fit on my body, it would look vastly different.
One of these measurements is being sneaky: the armhole depth. On paper, my measurement fits the size chart perfectly (the only one that does!) but unfortunately it’s not that simple. Some parts of garments don’t just need to fit the area they’re worn on; some of them also need to allow other body parts to pass through.
If you’ve ever designed a jumper for a baby, you know exactly what I mean. That crew neckline that keeps them warm and looks so cute is perfect, but you need to make sure it stretches aaaaaaaall the way out to allow their proportionally massive heads to pass through it.
Well, armholes are kinda the same if you have big upper arms. It’s not the depth that’s the issue, but the circumference. That opening is where your whole arm needs to pass through in order to put the garment on. So, tell me this: if my upper arm is 22″ circumference, but my armhole is only 20″ circumference, what happens when I put it on?
I’ll tell you: the sleeve gets a bit stuck. We’re now in negative ease territory, so it’s clinging to my arm (assuming the garment has stretched enough to let my arm in which, if it was knit in something like cotton, it might not). My arm probably isn’t going as far into the sleeve as I’d like, which means I have to grab the sleeve – not the easiest with negative ease, I’ve probably just pinched myself – and tug it up my arm. At best, that’s a hassle, and makes me feel bad that the garment doesn’t fit well. Maybe I’ve distorted my carefully blocked sleeves and now it looks messy. At worst? I’ve damaged it by pulling too hard.
Some of these differences can be accommodated with modifications. For example, that cross back measurement implies that I’d get a better fit in the shoulders if I sized down, and worked a full bust adjustment to accommodate the extra at the bust.
Modification Options
For boxy drop shoulder styles, there’s no need:
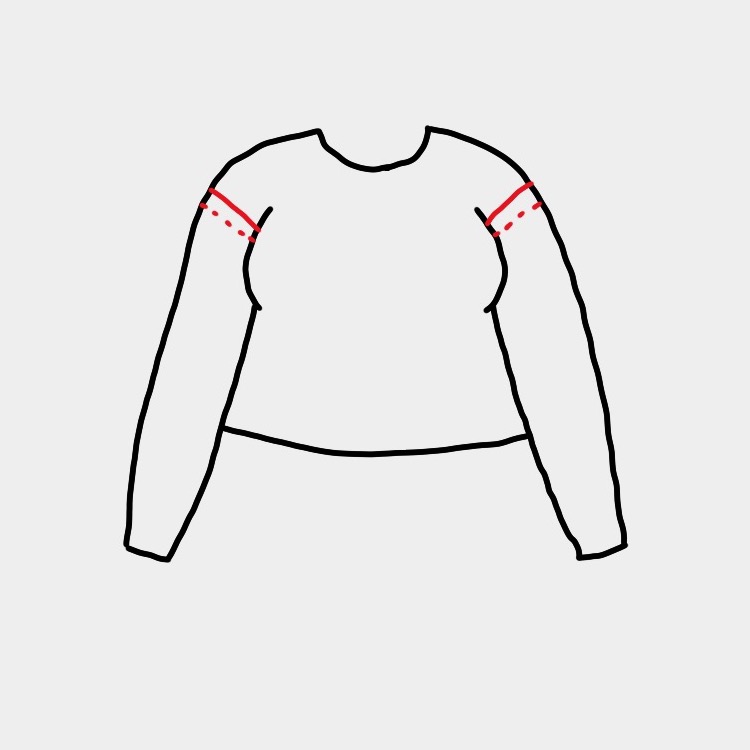
The illustration above shows the effect of my smaller cross back measurement when it comes to fit. The solid red lines indicate where the arms should meet the armscye, and the dotted red lines indicate where they will actually sit on me. As you can see, for a boxy drop shoulder design, it doesn’t make much difference. The real fit issue caused here is that the sleeve length will be 1.25″ longer – which, when my arms are already 1″ shorter, gives me 2.25″ extra length in the sleeve, which is enough that I might want to modify it.
But what happens if the garment has a different sleeve style?
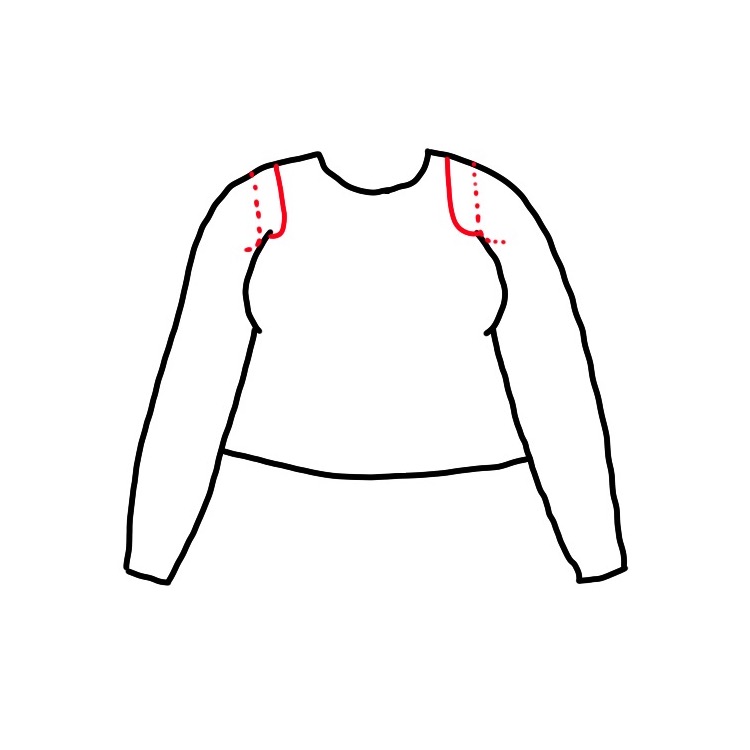
This illustration shows a set in sleeve. Again the solid red lines show where the sleeves should meet the body, and the dotted lines show where they will sit if my cross back measurement isn’t addressed. As you can see, it means the seam will sit further out. In terms of fit it will probably look okay – not a perfect fit, but not wrong enough to look terrible. However it also means that the armscye shaping will sit further out from the body. This will accommodate the full bust measurement, but it will also affect how the shaping sits around the shoulder and armpit, and it might make the garment look a bit messy overall, with slouchy shoulders, too-long sleeves, and extra fabric at the armpit and bunching at the side of the bust.
Some other areas mean not that the garment will be ill-fitting, but that it physically won’t go on my body. Any sleeve with less than 5″ positive ease will be smaller than my arm, meaning that it’ll look tight and probably feel uncomfortable, especially if there are any seams or colourwork in that area. Any long top with less than 10″ ease in the hips is going to cling tightly and uncomfortably to my largest area, the one that I am most self-conscious about, the one that changes the most when I sit down. (Note: I didn’t include my hip measurement taken sitting because my tape measure isn’t long enough.)
I’m not the only one
At this point I think we’ve established that my body does not fit the size chart, and that there are multiple areas where I need to make modifications, depending on the construction method and style of the garment and my personal preferences.
I have questions
But I’m just one person. No designer should be writing a pattern to fit one person. What I want to show is, how many people are there who don’t fit the size charts? The size charts show an average, yes, but are they serving the majority? Does that change as the sizes increase, and if so, what’s the magic point where things start getting challenging?
To answer these questions, I would need to ask a lot of people to give me some very personal and detailed measurements and then analyse the results. I’m more than happy to do that, but before diving into a big research experiment, I wanted to do a quick litmus test. How can I compare the sizes people actually are to the size charts, on a small scale, quickly?
Of course: the test applications for Roseability. Everyone who applied told me what body size and what sleeve size they intended to knit.
Getting answers
If I work out which body and sleeve sizes go together to create the “standard” sizes as per the Craft Yarn Council’s size charts, I can compare it to the sizes people actually chose. If the standard charts say that Size 1 goes with Sleeve B, then I would expect the majority of applicants for Size 1 to have also selected Sleeve B.
Now… this isn’t perfect science, not by a long shot. It’s a small and quite potentially biased sample. But it’s a start. If there are outliers here, then I’m not the only one, and it’s worth doing further research.
Standardising the data
So let’s start with working out how my sizing correlates to the standard Craft Yarn Council chart. I started by listing out all my garment body sizes and measurements, then listing out the “ideal” full bust measurement for each one by subtracting the recommended 6″ ease. This value went into the Full Bust column.
I then looked up each of these bust measurements on the Craft Yarn Council (CYC) size chart and filled in the corresponding size. Note that some sizes are used more than once, as I had 3″ between sizes, whereas CYC have 4″.
I then filled in the Upper Arm column based on the CYC size. This column is the actual body measurement given on the CYC size chart. From this I looked up which of my sleeve sizes would be the best fit for that arm measurement, giving as close to the recommended 2″ ease as possible.
In some cases this meant the sleeves were between sizes, in which case I have given both in that column.
| Body Size | Full Bust | CYC Size | Upper Arm | Sleeve Size |
| 01 – 36″ | 30″ | XS | 9.75″ | B – 12″ |
| 02 – 39″ | 33″ | S | 10.25″ | B – 12″ |
| 03 – 42″ | 36″ | M | 11″ | B – 12″ / C – 14″ |
| 04 – 45″ | 39″ | L | 12″ | C – 14″ |
| 05 – 48″ | 42″ | L | 12″ | C – 14″ |
| 06 – 51″ | 45″ | XL | 13.5″ | D – 16″ |
| 07 – 54″ | 48″ | 2X | 15.5″ | E – 18″ |
| 08 – 57″ | 51″ | 3X | 17″ | F – 20″ |
| 09 – 60″ | 54″ | 3X | 17″ | F – 20″ |
| 10 – 63″ | 57″ | 4X | 18.5″ | F – 20″ / G – 22″ |
| 11 – 66″ | 60″ | 5X | 18.5″ | F – 20″ / G – 22″ |
| 12 – 69″ | 63″ | n/a | n/a | n/a |
Immediately we can draw some conclusions. One is that the CYC sizing stops before mine does, so I can’t do any meaningful comparisons for size 12. The other is that even if I go to the very top of the CYC chart, I’ve still got 3.5″ more on the upper arm than the chart allows.
More importantly, what this chart shows me is that for Sizes 1-3, I should expect testers to be choosing Sleeve B. For Sizes 3-5, Size C. For Size 6, Sleeve D. And so on. And according to this, nobody needs a sleeve bigger than G. (Me! Me! I do! I knit size H!)
Now let’s look at what testers actually requested to knit.
I sorted this data into a pivot table, and highlighted the body-sleeve combinations that the CYC size chart tells me to expect in bright yellow.

(Note: Sleeve size J does exist, but nobody applied to knit it, so it doesn’t show up in the table.)
Understanding the data
Well. That’s interesting, isn’t it?
What I can see here is that, excluding Size 1, the smaller sizes are roughly where I’d expect them to be. Sizes 2 to 5 are all about right; the sleeve sizes being chosen are the ones I’d expect, or there abouts.
But look at those bigger sizes. Not only are there fewer testers choosing the “correct” sleeve size, and it’s important to note that there are some, but they’re having to go further away from the “correct” size to get a good fit.
Now like I said, this isn’t a representative sample, and given that Roseability was specifically designed to accommodate this exact fit issue, it’s reasonable to explain this data by concluding that a disproportionate number of people with this fit issue applied compared to the number that exist in the general population.
But that’s okay. I’m not trying to prove that I’m in the majority. I’m just trying to demonstrate that I exist and that I’m not alone. That this specific fit issue is one worth addressing. That there are knitters who can’t knit garments because of this issue.
This data perfectly demonstrates what I mean when I say that the bigger the body, the more variance there is. There are always going to be people whose bodies don’t fit the chart, all across the size range. But let’s do some quick maths.
Size 2 had 3 requests to knit sleeve size C. That’s 2″ bigger than the “correct” size of 12″. 2″ as a percentage of 12″ is 16.67%.
Size 11 had a request to knit sleeve size K. That’s 10″ bigger than the “correct” size of 20″. 10″ as a percentage of 20″ is 50%.
16.67% bigger versus 50″ bigger. 2″ bigger versus 10″ bigger. However you work it out, absolute numbers or proportionally, it’s bigger.
Not just practical motivation
When these applications came in, I started getting very emotional. Partly from happiness and excitement – first garment pattern and people want to test knit it, yay!!! – but also because I was seeing these size choices, and that’s when I knew for sure that this was something the knitting community needed. It wasn’t just me and the handful of people who saw my arms on Instagram and said hey, me too. This is necessary all the way up – and down – the size chart.
And let’s talk quickly about Size 1, shall we? Remembering that this is very much not my area of expertise, I’m just going to reiterate what this data shows me. Everyone who applied to knit Size 1 applied to knit Sleeve A, even though the CYC size chart says that a 30″ bust has a 9.75″ upper arm, which means 11.75″ with ease, which means B is a much closer fit than A. But there it is – the 10″ sleeve was deemed a better fit.
Some conclusions
Let’s go back to those questions I asked at the beginning.
How many people are there who don’t fit the size charts?
34 of 57 applicants opted for the “wrong” sleeve size. That’s 60%.
Are the size charts serving the majority?
According to this small, limited, potentially biased sample size, no. Serving 40% of people is not serving the majority. However, BIG disclaimer here about the sample size! And, of course, not all size charts are created equal. I’ve only looked at one here; I know of a number of people who have created new size charts which are much better representations of modern bodies.
What’s the magic point where things start getting challenging?
I think the visual of the pivot table shows this quite clearly: the deviations from the expected sleeve size occur at all body sizes, but they start trending downwards (i.e. needing bigger sleeves than expected) around size 6 (51″, to fit 45″), and that trend gently increases as the body size goes up.
Where do we go from here?
So. This is why not just size, but shape inclusivity is important. (If you’re new to this term, I talk about it a bit in my interview with Kristina and Sarah of Tech Tip Talk.)
The bigger bodies get, the more they vary. Yes, this means it’s hard to fit larger people. But the first step to solving a problem is understanding it. By seeing where people’s bodies diverge most from the size charts, designers can help to support us in making the modifications we need.
Every pattern is different, so there isn’t a nice neat solution, and it’s not practical to include mods for every single fit issue in every single pattern. But if we’re all thinking about these things every time we’re designing then between us, as a community, we’re going to work out solutions. And if we share them, if we’re open about what we’re doing and what’s working, then we can all choose to incorporate solutions – such as Mix and Match Body and Sleeve Sizing on drop shoulder garments – and make our patterns accessible to more and more people.
And that’s well worth it.
Roseability is available now.
If you’re interested in testing more size and shape inclusive garment patterns, sign up to the test email list.
